Showing posts with label DIY. Show all posts

Monday, February 6, 2012

DIY Pallet string Art

I have a really fun project to share with you today. This has actually taken me about 2 weeks to actually finish but its really easy. 

Here is what you need

-a pallet
-tiny nails
-string
-pliers
-hammer

Now you can draw anything onto your pallet or write anything. I decided the state of Florida would look cool so that is what I went with. 

I had my husband dismantle the pallet and then attach all the boards so they were close together.


Then he attached it to my wall


Next I had my dad draw Florida on it with chalk....{I guess I haven't done much so far but point fingers!}
At this stage you can make a heart, write the word "Love" or anything you want.

Then I took my tiny nails and some pliers and started nailing all the way around the chalk line leaving a little bit still sticking out. {Hold the tiny nails with the pliers... then you won't smash your fingers!}. This took a looooong time!


Then get your colored string and start by making a knot around one nail and then start wrapping randomly around each nail.

this is the string I used


Be prepared that this will take forever! Especially if you have little ones running around! When you get done with one line of string just tie it off and start a new one.

Here is my finished product.


Hope you like it and it gives you something to do with that old pallet!

Feel free to Pin it!


Pin It


Monday, January 30, 2012

How to take a pretty picture!

I have a really special treat for ya'll today. I asked my sisters friends Megan who is a photographer to share some tips for us on how to take pretty pictures. I'm excited to say that she said "yes" and that she is here today. So I will just let her take it away!!

Hi everyone!
The number one question I get from budding photographers is, "How do you make the background blurry?"  so I thought it would be fun to share some pro tips with you!


Let me start this lesson by stating that a beautiful photograph is much more than expensive equipment or a particular setting.  It's about lighting, emotion, background and lots and lots of practice using the gear you have.  It's taken me years to achieve this look so don't be too critical when you're getting started.


Secondly, I'm a stickler when I give camera lessons, because I usually only teach in Manual Mode (M), because this setting gives you absolute control over the outcome of the image, however I understand that it's taken me years to master this technique so here are the very basics to get you going.


1.  Basically, the technique to achieve this "blurred" background is controlled by the Aperture setting (AV).


2.  Instead of shooting in Auto (or green square) mode, switch the camera to AV (or person) mode.


3.  Dial the aperture down to the lowest setting (refer to your manual).  For most off-the-shelf cameras this is about 4.5.  If it can go lower keep dialing down!  For instance the above images were taken at an aperture between 2.8 and 1.6.


4.  The average lens will stop at 4.5+/- and you'll find it frustrating because you'll want a softer background. Here's what I tell everyone... you're going to have to pony up about $400-500 for another lens, but I promise it will be one of the best investments!  Canon's 50mm 1.4 is my all-time favorite lens.  You can also find the similar style for Nikon.  While you're at, get the lens filter to protect the lens - a wise investment!


5.  Purchasing quality is always the best choice, and I always recommend purchasing the name brand, not a cheaper brand.


6.  Just start playing around.  Experiment around the house; dinner table, kids playing, flowering plants, etc.  Have fun!!


7.  And let me know how it goes!


Thanks Megan! I can definitely use these tips! 

You can also find Megan blogging with my sister Kristin over at The Cardigan & The Cook. Be sure to stop by there to see more of her amazing pictures and be sure to tell her Hello!


 Facebook           Blog

Tuesday, January 10, 2012

DIY art

This lady here is not what anyone would call an artist. Crafty maybe, but not an artist. I love paintings but money can get a little tight here so I can't afford to buy anyone Else's work..... soooo I just get inspired and make my own. 


Here is what you need.

{i am a horrible indoor photographer}

I went to Hobby Lobby and bought a set of 2 canvas's and some teal acrylic paint. I looooove teal!
I have lots of stencils but you can buy some or make some... unless you like to free hand.
and a paint brush. I recommend a big one. I was working with a very small one {not fun}

I decided to write "HELLO" In the bottom corner with the stencils for lack of anything better to write!!


Then I painted every thing but the inside of the "hello" with my Teal paint.


and here is my finished product plus a chevron print that I made.


If you want to know how I did the chevron print here is how.
-use tape to make zig zags, the paint the who canvas. then peel off tape and the let dry. easy peasy.


Now here is the thing. I was inspired by From The Aisle To Aloha, If I had the money I would have just bought her stuff. Check her shop out if you get some time. It's really great!


{psst, great giveaway here. win stuff from Much.Love.Illy and 6 more!}


The 36th Avenue


like this? try it in other colors and use different words!
have fun

Pin It

Tuesday, December 27, 2011

4 step every day eye makeup

Here is a quick tutorial on how I do my eye makeup every day. At the moment I am into shades of purple but this can work for any color.


and for tips I use eye shadow with a thin brush that is wet to make eye liner!

...and yes I use the sponge-y thing that comes with eye shadow! I feel like if i smash it on there it will stay better! {haha} 
Hope you enjoy! How do you apply eye makeup?!

Don't forget to Pin it!

Pin It


The 36th Avenue

Wednesday, December 14, 2011

DIY Christmas Tree Ornaments

This morning my mom and step sister came over so we could make glittery ornaments! We had a blast. This is a great project to do with the kids so I saved a few so Brad could work on some when he got home from school.

Here is what you need.

-Glue
-Glitter
-Paint Brushes
-Plain Ornaments
-A wooden rod 

First paint the glue on your ornaments. Fee free to write names, draw a snowman or make zig-zags.

Then Sprinkle your glitter on the glue.

The put on the wood rod and let dry

-I think some sealer spray to so the glitter stays longer... but I haven't got that yet!

Easy peasy!


So that was fun right?! We tried to tape sections off to make lines... but it didn't work to well. But it was a fun simple craft to start the day off right!

Share some photos with me when your done!

{Happy Hump Day!}

And for your shopping pleasure a FLASH SALE!!!
enter "LOVELOVE" at check out in the SHOP for 30% off today only!
This is the biggest and the only time I will offer such a discount... so take advantage!!!

Sunday, November 27, 2011

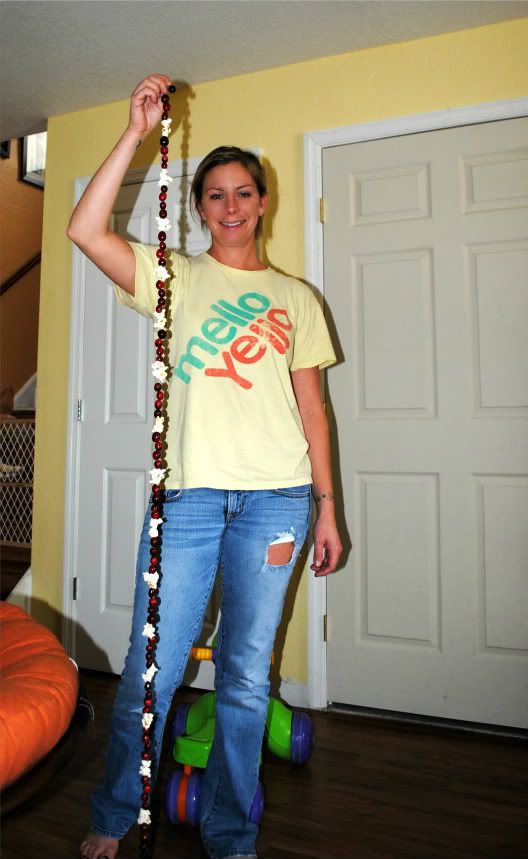
DIY tree garland

I know most of you have probably decorated your Christmas trees 
all ready, but if you haven't here is a fun little craft 
to do to put on your tree.

My mom made us do this every year when I was a kid, I'm not even sure where she got the idea from but doesn't take long, 
it's cheep, and you can do it while you watch t.v.,
My kind of craft. 


Home made garland

Here is what you need 

-Needle and thread
-Fresh cranberries
-Popcorn


Big list right?


Now that you have what you need,
take you thread and unroll about 5 feet, then put you needle on it.
Make a pattern how ever you want with the popcorn and cranberries. I used 4 cranberries and 2 popcorn. 


Fill up your 5 foot of thread and then drape it onto your tree.
Repeat till you have enough to drape allover the whole tree. I have a 5 foot tree this year and I needed to do about 4 of these strings.

{bad bad pic of me}


That's it! So easy right? Good thing about this is when Christmas is over you can hang it outside for the birds to eat.

Have fun crafty mommas and put those kids to work!


Related Posts Plugin for WordPress, Blogger...